
Why Grout Keeps Cracking in the Same Spots
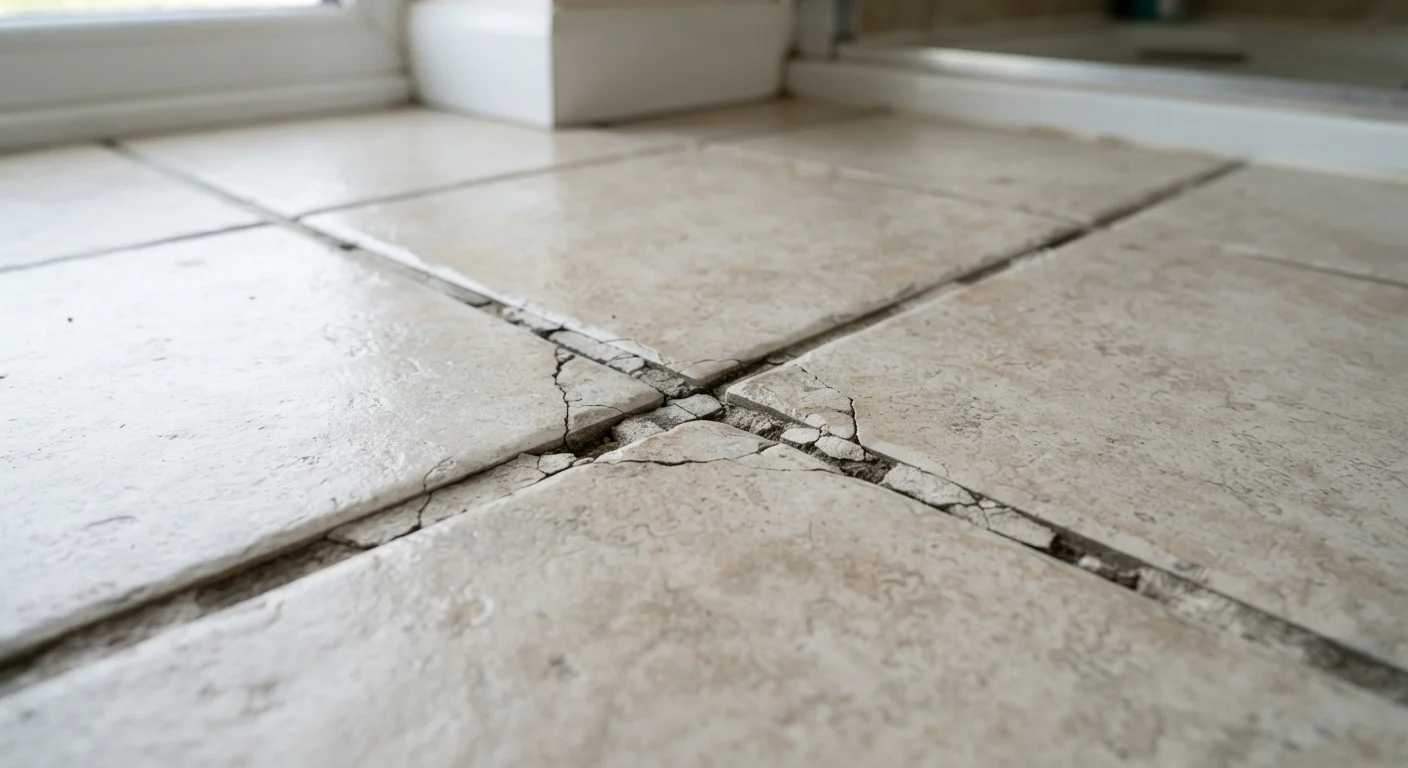
If you've repaired grout lines only to watch them crack again within weeks or months, you're not imagining the frustration - and you're not doing it wrong. Grout is a rigid material, and when the surfaces it holds together shift even slightly, that rigidity becomes a liability. The tile assembly is essentially telling you something: there's movement happening that grout alone cannot absorb.
Common culprits include a flexible or inadequately thick subfloor, settlement in the home's structure, thermal expansion in outdoor or large-format tile installations, and chronic moisture infiltration that softens the mortar bed beneath. Before reaching for the grout float again, understanding why cracks form in specific locations will determine whether your repair lasts a season or a decade.
Applying new grout directly over cracked or failing grout without removing the old material first.
Why it happens: It looks faster and less disruptive - scraping out old grout takes time and the right tool, so many homeowners skip it.
Ignoring a flexible or bouncy subfloor before tiling or regrouting over it.
Why it happens: Subfloor deflection is invisible once tile is down, and many homeowners assume a flat surface means a stable one.
Using grout in corner joints and the seam where the floor meets the wall instead of flexible caulk.
Why it happens: Grout is what most people associate with tile joints, so it gets applied everywhere regardless of joint location.
Skipping the cure time and exposing fresh grout to water or foot traffic too soon.
Why it happens: Grout looks dry to the touch quickly, which creates a false sense that the repair is complete and ready for use.
Using unsanded grout in wide joints or sanded grout in very narrow ones.
Why it happens: Many homeowners use whatever grout is on hand or grab a generic product without checking the joint width requirement.
How to Approach Grout Repairs That Actually Hold
Once you've diagnosed the underlying cause, the repair process becomes much more deliberate. Start by fully removing the failed grout - a rotary tool with a grout removal bit or a manual grout saw is the right approach. Grinding new grout over old never bonds properly; the old material acts as a barrier and the repair fails at the same interface.
Check for Loose Tiles Before Regrouting
Regrouting over tiles that have lost their bond to the mortar bed will not hold. Press firmly on each tile in the repair area and tap with a knuckle - a hollow or clunking sound indicates the tile is no longer adhered. Resetting loose tiles before applying fresh grout is essential; skipping this step guarantees repeat failures. If a large area of tile has lost adhesion, consult a licensed tile installer to assess whether full removal and re-tiling is warranted.
After clearing the joint, inspect the tile edges and mortar bed for any looseness or hollow spots (tap tiles gently - a hollow sound indicates the bond has failed). Loose tiles must be reset before regrouting. Once everything is stable and clean, apply fresh grout matched to the original joint width and type, following the manufacturer's cure time before allowing foot traffic or moisture exposure.
In corner joints, along walls, and wherever two surfaces meet at an angle, replace grout with a color-matched sanded caulk. These zones experience the most movement, and caulk's flexibility lets it move without cracking. This single substitution eliminates a large share of recurring failures in bathroom and kitchen tile work.
1/8"
Joint width threshold for sanded vs. unsanded grout
Industry tile installation guidelines recommend sanded grout for joints at or wider than 1/8 inch to prevent shrinkage cracking.
72 hrs
Typical maximum grout cure time before moisture exposure
Most cement-based grout manufacturers specify a 24-72 hour cure window depending on product type, humidity, and ambient temperature.